Let’s start with HadoopNameNode (master), repeat this for SNN and 2 slaves. Connect to HadoopNameNode through PuTTY and follow the commands.
Update the packages and dependencies
| $ sudo apt-get update |
Install Oracle Java
Install the latest Oracle Java (JDK) 7 in Ubuntu
| $ sudo apt-get install oracle-jdk7-installer |
Check if Ubuntu uses Oracle JDK 7
| $ java –version java version “1.7.0_72” Java(TM) SE Runtime Environment (build 1.7.0_72-b14) Java HotSpot(TM) 64-Bit Server VM (build 24.72-b04, mixed mode) |
Download and Install Hadoop
I am going to use Hadoop 1.2.1 stable version from apache download page and here is the 1.2.1 mirror
Issue wget command from shell to download Hadoop
| $ wget http://apache.mirror.gtcomm.net/hadoop/common/hadoop-1.2.1/hadoop-1.2.1.tar.gz |
Unzip the files and review the package content and configuration files.
| $ tar -xzvf hadoop-1.2.1.tar.gz |
For simplicity, rename the ‘hadoop-1.2.1’ directory to ‘hadoop’ for ease of operation and maintenance.
| $ mv hadoop-1.2.1 hadoop |
Setup Environment Variable
Setup Environment Variable for ‘ubuntu’ user
Update the .bashrc file to add important Hadoop paths and directories. Add following at the end of file.
| $ vi .bashrc export HADOOP_CONF=/home/ubuntu/hadoop/conf export HADOOP_PREFIX=/home/ubuntu/hadoop #Set JAVA_HOME export JAVA_HOME=/usr/lib/jvm/java-7-oracle #Add Hadoop bin/ directory to path export PATH=$PATH:$HADOOP_PREFIX/bin |
Save and Exit.
To check whether it’s been updated correctly or not, reload bash profile, use following commands
| $ source ~/.bashrc $ echo $HADOOP_PREFIX $ echo $HADOOP_CONF |
Note: Repeat the above steps for remaining 3 machines (SNN and 2 slaves).
Setup Password-less SSH on Servers
Master server remotely starts services on salve nodes, which requires password-less access to Slave Servers. You can find more details on SSH key based login and password-less SSH login here [Password-less SSH Login].
Quick Note:
Now we need to add the AWS EC2 Key Pair identity haddopec2cluster.pem to SSH profile. In order to do that we will need to use following ssh utilities
- ‘ssh-agent’ is a background program that handles passwords for SSH private keys.
- ‘ssh-add’ command prompts the user for a private key password and adds it to the list maintained by ssh-agent. Once you add a password to ssh-agent, you will not be asked to provide the key when using SSH or SCP to connect to hosts with your public key.
Amazon EC2 Instance has already taken care of ‘authorized_keys’ on master server, execute following commands to allow password-less SSH connect to slave servers.
| $ eval `ssh-agent` $ ssh-add hadoopec2cluster.pem |
Note:
- Make sure you use the backquote ( ` ) for ssh-agent, located under the tilde ( ~ ), rather than the single quote ( ‘ ).
- Keep in mind ssh session will be lost upon shell exit and you have to repeat “ssh-agent” and “ssh-add” commands.
If you encounter file permissions error (see screen shot below), you need to issue following “chmod” commands

| $ chmod 644 .ssh/authorized_keys $ chmod 400 hadoopec2cluster.pem |
Let’s verify that we can connect into SNN and two slave nodes from master (HadoopNameNode)
| $ ssh ubuntu@<your-amazon-ec2-public URL> $ exit |

On successful login the IP address on the shell will change.
Hadoop Cluster Setup
This section will cover the Hadoop cluster configuration. We will have to modify
- hadoop-env.sh– This file contains some environment variable settings used by Hadoop. You can use these to affect some aspects of Hadoop daemon behavior, such as where log files are stored, the maximum amount of heap used etc. The only variable you should need to change at this point is in this file is JAVA_HOME, which specifies the path to the Java 1.7.x installation used by Hadoop.
- core-site.xml– key property fs.default.name – for namenode configuration for e.g hdfs://namenode/
- hdfs-site.xml – key property – dfs.replication – by default 3
- mapred-site.xml– key property mapred.job.tracker for jobtracker configuration for e.g jobtracker:8021
We will first start with master (NameNode) and then copy above changes files to remaining 3 nodes (SNN and two slaves)
Finally, in section 1.6.2 we will have to configure conf/masters and conf/slaves.
- masters– defines on which machines Hadoop will start secondary NameNodes in our multi-node cluster.
- slaves– defines the lists of hosts, one per line, where the Hadoop slave daemons (datanodes and tasktrackers) will run.
Let’s go over one by one. Start with masters (HadoopNameNode).
hadoop-env.sh (add JAVA_HOME shown below and save changes)
| $ vi $HADOOP_CONF/hadoop-env.sh #Set JAVA_HOME export JAVA_HOME=/usr/lib/jvm/java-7-oracle |
core-site.xml
We are going to add two properties
- default.name will point to NameNode URL and port (usually 8020)
- tmp.dir – A base for other temporary directories. It’s important to note that every node needs hadoop tmp directory. I am going to create a new directory “hdfstmp” as below in all 4 nodes.
| $ mkdir hdfstmp $ vi $HADOOP_CONF/core-site.xml <configuration> <property> <name>fs.default.name</name> <value>hdfs://ec2-54-149-220-249.us-west-2.compute.amazonaws.com:8020</value> </property> <property> <name>hadoop.tmp.dir</name> <value>/home/ubuntu/hdfstmp</value> </property> </configuration> |
hdfs-site.xml
We are going to add 2 properties
- permissions.enabledwith value false, This means that any user, not just the “hdfs” user, can do anything they want to HDFS so do not do this in production unless you have a very good reason. If “true”, enable permission checking in HDFS. If “false”, permission checking is turned off, but all other behavior is unchanged. Switching from one parameter value to the other does not change the mode, owner or group of files or directories. Be very careful before you set this
- replication – Default block replication is 3. The actual number of replications can be specified when the file is created. The default is used if replication is not specified in create time. Since we have 2 slave nodes we will set this value to 2.
| $ vi $HADOOP_CONF/hdfs-site.xml <configuration> <property> <name>dfs.replication</name> <value>2</value> </property> <property> <name>dfs.permissions</name> <value>false</value> </property> </configuration> |
mapred-site.xml
This file contains the configuration settings for MapReduce daemons; the job tracker and the task-trackers.
The mapred.job.tracker parameter is a hostname (or IP address) and port pair on which the Job Tracker listens for RPC communication. This parameter specify the location of the Job Tracker for Task Trackers and MapReduce clients.
JobTracker will be running on master (HadoopNameNode)
| $ vi $HADOOP_CONF/mapred-site.xml <configuration> <property> <name>mapred.job.tracker</name> <value>hdfs://ec2-54-149-220-249.us-west-2.compute.amazonaws.com:8021</value> </property> </configuration> |
Copy configuration files to other nodes
Now, we are done with hadoop xml files configuration master, let’s copy the files to remaining 3 nodes using secure copy (scp). Start with SNN. From master’s UNIX shell issue below command.
| $ scp $HADOOP_CONF/hadoop-env.sh $HADOOP_CONF/core-site.xml $HADOOP_CONF/hdfs-site.xml $HADOOP_CONF/mapred-site.xml ubuntu@ec2-54-149-231-70.us-west-2.compute.amazonaws.com:/home/ubuntu/hadoop/conf |
Repeat this for other slave nodes
Configure Master and Slaves
Every hadoop distribution comes with master and slaves files. By default it contains one entry for localhost, we have to modify these 2 files on both “masters” (HadoopNameNode) and “slaves” (HadoopDataNode1 and HadoopDataNode2) machines – we have a dedicated machine for HadoopSecondaryNamdeNode.

Modify masters file on Master machine
This file defines on which machines Hadoop will start Secondary NameNodes in our multi-node cluster. In our case, there will be two machines HadoopNameNode and HadoopSecondaryNameNode
| $ cd hadoop/conf $ vi masters |

Modify slaves file on Master machine
The slaves file is used for starting DataNodes and TaskTrackers
| $ cd hadoop/conf $ vi slaves |

Copy masters and slaves to SecondaryNameNode
Since SecondayNameNode configuration will be same as NameNode, we need to copy master and slaves files from HadoopNameNode to HadoopSecondaryNameNode.
| $ scp masters slaves ubuntu@ec2-54-149-231-70.us-west-2.compute.amazonaws.com:/home/ubuntu/hadoop/conf |
Configure master and slaves on “Slaves” nodes
Since we are configuring slaves (HadoopDataNode1 & HadoopDataNode2), masters file on both slave machines is going to be EMPTY. First HadoopDataNode1
| $ cd hadoop/conf $ vi masters |

Notice that the ‘slaves’ file at Slave node contains only its own IP address and not of any other Data Node in the cluster.
| $ cd hadoop/conf $ vi slaves |

Repeat this for other slave nodes (In our case, HadoopDataNode2)
Hadoop Daemon Startup
The first step to starting up your Hadoop installation is formatting the Hadoop file system which runs on top of your, which is implemented on top of the local file systems of your cluster. You need to do this the first time you set up a Hadoop installation. Do not format a running Hadoop file system, this will cause all your data to be erased. Run the below command in HadoopNameNode.
| $ cd hadoop/conf $ hadoop namenode –format |
Let’s start all hadoop daemons from HadoopNameNode
| $ cd hadoop/conf $ start-all.sh |
This will start NameNode,JobTracker and SecondaryNameNode daemons on HadoopNameNode

Check services are running. Run jps command on all machines (SNN, two Slaves) should show the started process ID and process name.
| $ cd hadoop/conf $ jps |
We can check the HadoopNameNode status from http://ec2-54-149-220-249.us-west-2.compute.amazonaws.com:50070/dfshealth.jsp

Check Jobtracker status on HadoopNameNode: http://ec2-54-149-220-249.us-west-2.compute.amazonaws.com:50030/jobtracker.jsp

Check Slave Node Status for HadoopDataNode1: http://ec2-54-149-231-68.us-west-2.compute.amazonaws.com:50060/tasktracker.jsp
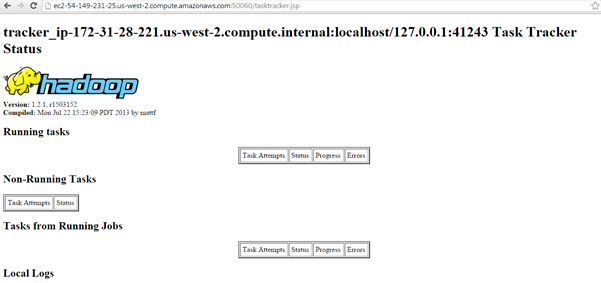
Check Slave Node Status for HadoopDataNode2 : http://ec2-54-149-231-25.us-west-2.compute.amazonaws.com:50060/tasktracker.jsp


[…] Part 3 – Now we are ready to introduce Hadoop installation and cluster setup. […]
LikeLike
why do u use hadoop 1.2.1? why not the latest 2.6.0?
LikeLike
Anupama, great to see your comment. I have used hadoop version 1.2.1 for some of our first time users. As you know that hadoop 2.x introduced YARN. I am coming to the latest version of hadoop with all it’s ecosystems in my next post “Installing Cloudera Manager and CDH on Amazon EC2”
LikeLike